Games can be made in many different ways. Many games are made using big, general purpose game engines such as Unity and Godot. I enjoy using the Odin Programming Language combined with Raylib.
Odin is a C-like programming language and Raylib is library for drawing graphics, checking input and playing sounds. So it’s just a program that uses a simple library, no engine!
There are no objectively best ways to create games. But one important aspect is to have fun. Because having fun makes you more productive. It’s also important that you actually get things done. In my case, Odin + Raylib fills both these shoes.
Let’s look at how get up and running with Odin + Raylib and then talk about some hurdles you need to get over when going engine-less.
If you want to learn more about Odin, then check out my book: https://odinbook.com/
Getting started
Set up Odin using the instructions here: https://odin-lang.org/docs/install/
It comes with Raylib as part of its “vendor” collection. In order to get started, just put the code below into a file called main.odin in an empty folder. Then use the command-line to navigate into that folder and execute odin run . (including the period!).
package game

import rl "vendor:raylib"

main :: proc() {
	rl.InitWindow(1280, 720, "My Odin + Raylib game")

	for !rl.WindowShouldClose() {
		rl.BeginDrawing()
		rl.ClearBackground({160, 200, 255, 255})
		rl.EndDrawing()
	}

	rl.CloseWindow()
}
The result looks like in the image below: A blue window! It should work on Windows, Mac and Linux.
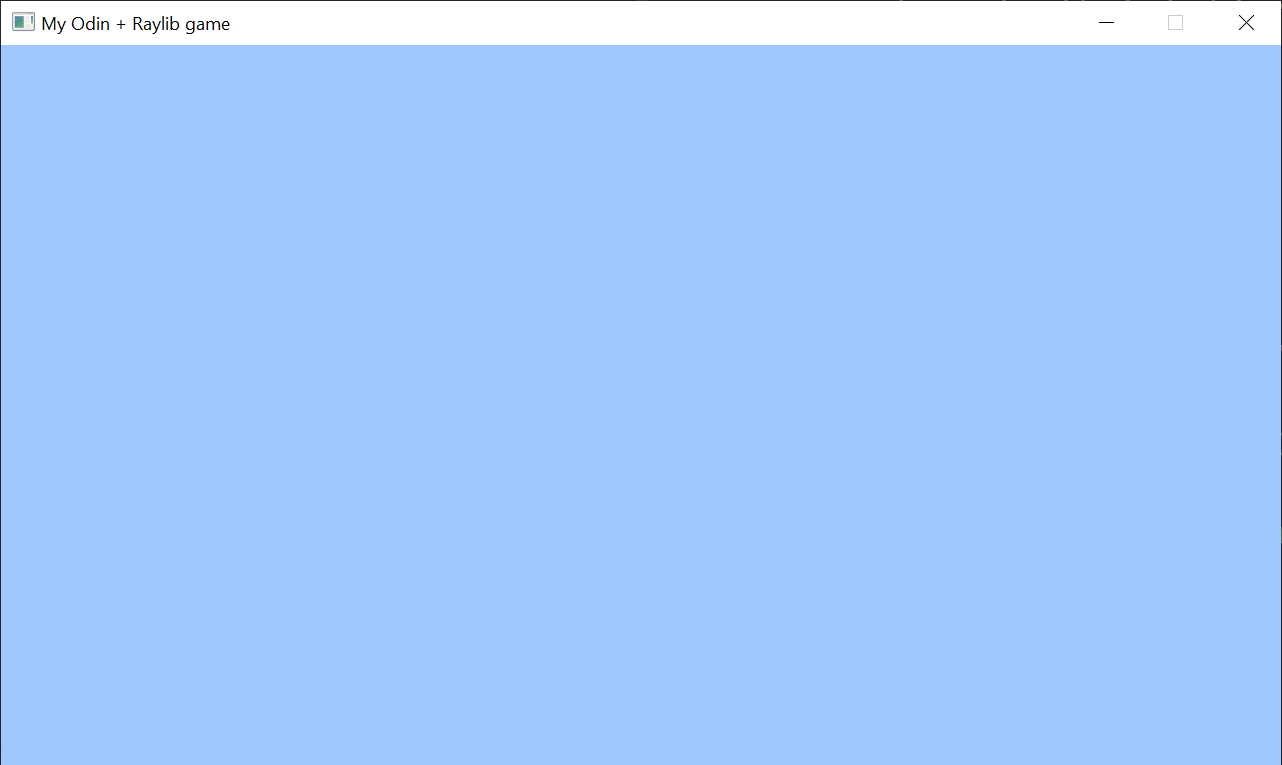
Compared to using a big, general purpose game engine like Unity or Godot, I enjoy that this is just a program. It’s an old, classic main procedure that opens a window and draws stuff in a loop.
This program imports the vendor:raylib package. You’ll find that package in the vendor/raylib folder of where-ever you installed Odin. Inside the raylib.odin file you can see all the available procedures of Raylib.
Player graphics
Let’s make our game draw something more than just a blue background.
Open your favorite image editor and draw something. Save it as player.png next to your Odin code.
Alternatively, use this picture:

The program below has been modified to load the image and draw it at coordinates x = 60, y = 40
package game

import rl "vendor:raylib"

main :: proc() {
	rl.InitWindow(1280, 720, "My Odin + Raylib game")
	// NEW LINE:
	player := rl.LoadTexture("player.png")

	for !rl.WindowShouldClose() {
		rl.BeginDrawing()
		rl.ClearBackground({160, 200, 255, 255})
		// NEW LINE:
		rl.DrawTextureV(player, {60, 40}, rl.WHITE)
		rl.EndDrawing()
	}

	rl.CloseWindow()
}
Note that the loading of the texture (image) must happen after rl.InitWindow: Raylib isn’t set up properly before InitWindow has been run. The game will now look like this:
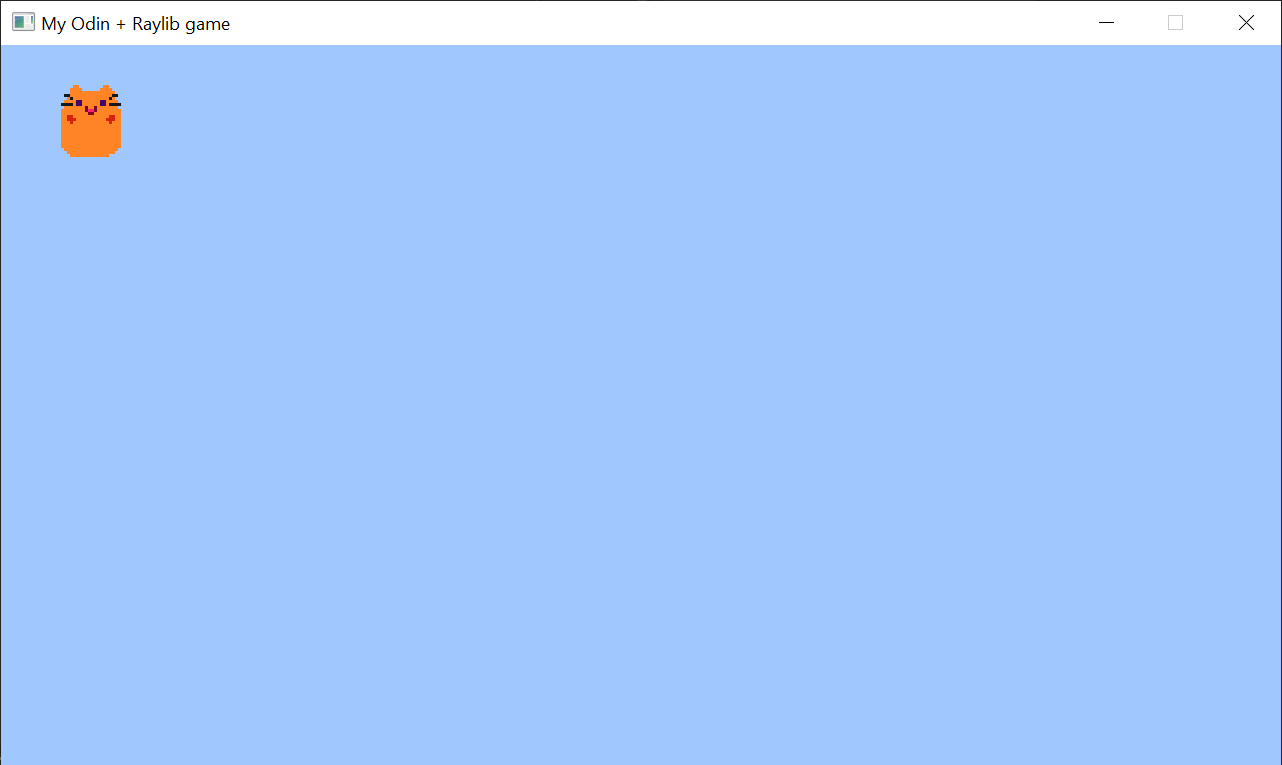
This art will represent the “player” of our game.
Moving the player
In order to move the player we need to check for input, update some kind of position and use that position to draw the player.
Below we’ve added a player_pos variable. Each frame (each lap of the for loop), we create an input variable based on which arrow keys are held down. We then add input to the player_pos variable. The player_pos variable is used in the call to rl.DrawTextureV:
package game

import rl "vendor:raylib"
// NEW LINE:
import la "core:math/linalg"

main :: proc() {
	rl.InitWindow(1280, 720, "My Odin + Raylib game")
	player := rl.LoadTexture("player.png")
	// NEW LINE:
	player_pos: [2]f32

	for !rl.WindowShouldClose() {
		// NEW BLOCK START
		input: [2]f32

		if rl.IsKeyDown(.UP) {
			input.y -= 1
		}
		if rl.IsKeyDown(.DOWN) {
			input.y += 1
		}
		if rl.IsKeyDown(.LEFT) {
			input.x -= 1
		}
		if rl.IsKeyDown(.RIGHT) {
			input.x += 1
		}

		player_pos += la.normalize0(input) * rl.GetFrameTime()
		// NEW BLOCK END

		rl.BeginDrawing()
		rl.ClearBackground({160, 200, 255, 255})
		// MODIFIED LINE (use player_pos):
		rl.DrawTextureV(player, player_pos, rl.WHITE)
		rl.EndDrawing()
	}

	rl.CloseWindow()
}
Here’s a thing I love about Odin: How fixed array can be used to represent positions and directions in 2D and 3D space. Note how player_pos and input are both of type [2]f32. We can modify the x and y parts of input by just typing input.x and input.y. No special type with fields named x and y fields are required: Odin lets you index numeric fixed arrays of length 4 or smaller using xyzw and rgba.
Also note how we add input to player_pos: After normalizing it (stops player from running faster diagonally), we can multiply it by the frame time (make the movement frame rate independent) and then just add it to the player_pos. You can do math like this on fixed arrays! No need for any operator overloading in order to implement simple vector maths.
You can define a type
Vec2 :: [2]f32so you can typeVec2instead of[2]f32.
The la.normalize0 procedure is available because we imported the linear algebra package. That’s also very handy for making games. Explore the package here: https://pkg.odin-lang.org/core/math/linalg/
A simple and powerful workflow
Drawing graphics and reacting to input is the foundation of video games. In the examples above we saw how we can easily get started with all that, without any big game engine!
But unlike going “no-engine” in some other languages, we quickly got up and running with 2D maths, without having to define any “2D vector class” or anything. It was a joy to get going with!
And the joy doesn’t stop there: Odin is also a C-like and fairly low-level language. You can get performance similar to C and C++, while having very fun.
I usually say that Odin is “low level with high-level feeling”.
I created a game called CAT & ONION using Odin and Raylib, and put it on Steam: https://store.steampowered.com/app/2781210/CAT__ONION/ – This shows that it is a production ready combination. The most important part of getting it done was that I had fun while doing it, because that kept me productive.
The game is also available on itch.io. That version comes with the full source code: https://zylinski.itch.io/cat-and-onion
More than the basics!
There’s more to games than just drawing graphics and checking input. Big game engines give you systems for things such as:
- Importing assets
- Managing the game world
- Editing levels
Let’s look at some aspects of how you can do that.
Importing assets
One good principle when doing no-engine development is starting simple and only adding concepts as you need them.
Otherwise you’ll start implementing features you don’t actually need, and you’ll never finish the game.
Start by just loading textures like we did in the earlier examples.
Eventually you may want to load textures once and store them in a central place, so you can re-fetch them. You could that by mapping the path to a loaded texture:
textures: map[string]rl.Texture

load_texture :: proc(path: string) -> rl.Texture {
	if t, t_ok := textures[path]; t_ok {
		return t
	}

	t := rl.LoadTexture(strings.clone_to_cstring(path, context.temp_allocator))

	if t.id != 0 {
		textures[path] = t
	}

	return t
}
You can now use load_texture("player.png") multiple times in your code, but the texture will only be loaded once.
What’s that temp_allocator thing?
The previous example also showcases how to use the temp allocator. Note what we feed into rl.LoadTexture:
strings.clone_to_cstring(path, context.temp_allocator)
Raylib is written in C and needs a cstring for the texture path. Converting an Odin string to a cstring requires some kind of allocation. Here we clone the string using the temp_allocator.
The temp_allocator can be used for things that you don’t need to have around for a long period of time. You decide how long that time is by manually clearing the temp allocator, which you can do by putting this at the bottom of your game’s main loop:
free_all(context.temp_allocator)
In other words, something like this:
for !rl.WindowShouldClose() {
	rl.BeginDrawing()
	// Draw the game.
	rl.EndDrawing()
	free_all(context.temp_allocator)
}
This is super handy for making games: You can use the temp allocator to allocate things that are only needed during the current frame. This simplifies memory management.
When getting more serious about game development, it’s common to start using several types of allocators. Odin’s built-in support for custom allocators makes all this a breeze. You can also use custom allocators to track memory leaks.
Atlased textures
Another way to manage your textures is to have a single big texture called an atlas. That way you only have a few textures loaded! I’ve written an Odin program that combines all the textures in a folder into an atlas: https://github.com/karl-zylinski/atlas-builder
As usual, I recommend starting simple, perhaps without any atlas. But if you want it down the line, then you can look into my solution for inspiration!
Managing the game world
Many games use entities. Don’t be tricked into making an entity component system the first thing you do. That’s overkill and over-engineering.
In fact, most games don’t need an entity component system at all. Personally, I just think it makes the game harder to make because it add lots of friction to the creative programming process.
To get started, just make a simple Entity struct. Also make a World struct that contains an array of such entities:
Entity :: struct {
	pos: [2]f32,
	tex: rl.Texture,
}

World :: struct {
	entities: [dynamic]Entity,
}

add_entity :: proc(w: ^World, e: Entity) {
	append(&w.entities, e)
}
To draw the entities, you just loop over the array and call the appropriate Raylib procedure:
for e in world.entities {
	rl.DrawTextureV(e.tex, e.pos, rl.WHITE)
}
Quite soon you may run into problems related to safely storing references to entities, such as having a reference to the player entity, to an NPC in the game, etc.
There are a bunch things to take into account here:
- Just storing a pointer to an item in the
entitiesdynamic array is bad, because the array may grow. That can make your pointer invalid and crash your game. - You could change the type of
entitiesto[dynamic]^Entityand separately allocate each entity. But that’s bad for performance. Read more about this and the previous point in this article: https://zylinski.se/posts/handle-based-maps-three-implementations/ - Instead, you can use an index as a handle. You’ll probably also need to store a generation counter. Read more about that in these two articles: https://zylinski.se/posts/handle-based-arrays/ and https://zylinski.se/posts/handle-based-maps-three-implementations/
If you look into those articles, you may end up want an implementation for a handle-based map. I’ve made an open-source package for that: https://github.com/karl-zylinski/odin-handle-map
The handle-based map can become the basis for storing the entities of your game world and managing references to entities.
Editing levels
A big deal about using off-the-shelf game engines is that they usually provide a level editor.
The trick to creating the level editor yourself is to only implement the things you need. Don’t try to copy the editors of engines like Unity or Godot! You probably only need a tiny part of what they provide. Just do the most simple thing. Do not try to make a “general purpose game engine”, I’ve written about why that is a trap: https://zylinski.se/posts/solodevs-and-the-trap-of-the-game-engine/
You can write an editor that keeps a separate World and adds and removes things from it. For saving and loading the level, you can for example use the core:encoding/json package.
Personally, I put the editor within the same executable as my game. But you could also make a separate program.
If you don’t enjoy making level editors, then you can use third-party level editors for this, such as LDtk or Tiled. I like making editors using Raylib because it is simple to make panels, buttons and display text. I’ve also tried to make my own editors when working with more low-level libraries such as Sokol, but in that case I didn’t find the editor programming enjoyable due to being forced to first implement lots of basic 2D drawing stuff. Find the method that is fun and productive for you.
I’ve made a whole video on this topic:
When you get stuck
As you happily program away you’ll eventually run into roadblocks. You may have trouble figuring out how to solve the next problem.
Sometimes it’s about figuring out an algorithm to do a specific thing.
But very often it’s that the game’s code has gotten overly complicated and you’ve gotten lost in your own sauce.
In that case I recommend these things:
- Simplify the code as much as possible. If you’re making complicated data structures with lots of Cool Smart Stuff then try just having simple arrays of data and process it using simple loops.
- Understand your code. Try to get rid of as many assumptions as possible. When you remove assumptions you’ll be able to rewrite code in a simpler way. It will become clear that some “complicated workarounds” were just a case of “ignorantly kicking a machine until it kinda works”.
- Ask for advice. For example, ask in the gamedev and Odin channels on my Discord server: https://discord.gg/4FsHgtBmFK
Going 3D
You can also create 3D games using Odin and Raylib. Below is a small program that shows a spinning 3D cube. You can move it using the arrow keys.
package game

import rl "vendor:raylib"
import la "core:math/linalg"

main :: proc() {
	rl.InitWindow(1280, 720, "My Odin + Raylib game")
	cube := rl.GenMeshCube(1, 1, 1)
	cube_mat := rl.LoadMaterialDefault()
	cube_pos: [3]f32

	for !rl.WindowShouldClose() {
		input: [3]f32

		if rl.IsKeyDown(.UP) {
			input.y += 1
		}
		if rl.IsKeyDown(.DOWN) {
			input.y -= 1
		}
		if rl.IsKeyDown(.LEFT) {
			input.x -= 1
		}
		if rl.IsKeyDown(.RIGHT) {
			input.x += 1
		}

		cube_pos += la.normalize0(input) * 5 * rl.GetFrameTime()

		rl.BeginDrawing()
		rl.ClearBackground({160, 200, 255, 255})
		cam := rl.Camera3D {
			position = {0, 3, 3},
			target = {0, 0, 0},
			up = {0, 1, 0},
			fovy = 70,
			projection = .PERSPECTIVE,
		}
		rl.BeginMode3D(cam)
		t := f32(rl.GetTime())
		rot := [3]f32{t, t*2, t*3}
		transf := rl.MatrixTranslate(cube_pos.x, cube_pos.y, cube_pos.z) * rl.MatrixRotateXYZ(rot)
		rl.DrawMesh(cube, cube_mat, transf)
		rl.EndMode3D()
		rl.EndDrawing()
		free_all(context.temp_allocator)
	}

	rl.CloseWindow()
}
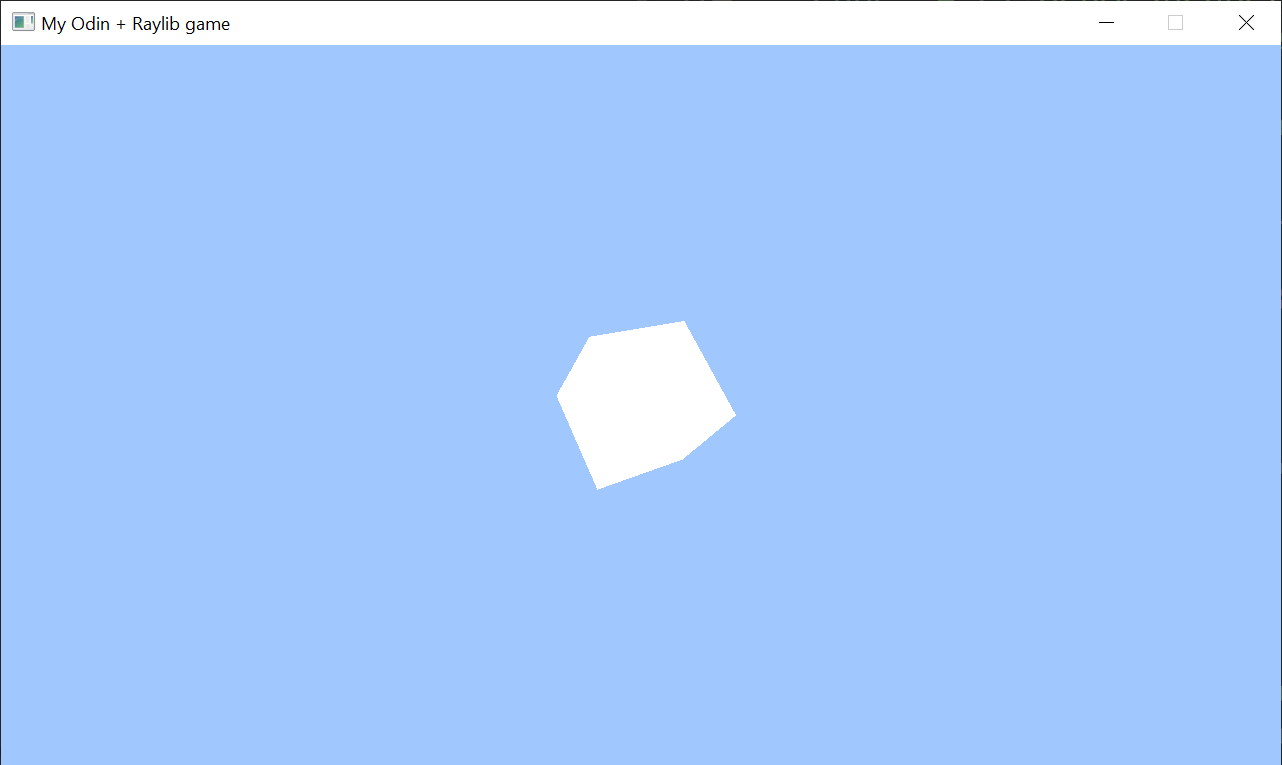
The cube is unshaded and looks like this:
You can use rl.LoadModel to load complete 3D models from a file, including any materials. You can use rl.LoadShader to load shaders, making it possible to create custom lighting and effects.
Hot reload
I think code hot reload can be very beneficial for tweaking gameplay code. It essentially means that you swap out the code but keep the same “game memory”.
I’ve written about this before here and I have made an Odin + Raylib + Hot Reload template. The template might be good starting point for a game if you want hot reload capabilities.
Web builds
Being able to put a game on the web can be very important when for example participating in a gamejam.
The hot reload template I linked in the previous section has web build support. I also have a separate “Odin + Raylib on the web” repository if you just want the web stuff. The web build has some limitations. Please see the “Troubleshooting” section in the README if you run into any problems.
Learning more
I’ve written a book on Odin. It’s great for people who come from other languages and also want a friendly introduction to low-level programming: https://odinbook.com
I have in blog + video series on video game creation using Odin: https://zylinski.se/posts/gamedev-for-beginners-using-odin-and-raylib-1/
I also have videos on how to make “Snake” and “Breakout” using Odin + Raylib:
Thanks for reading!
Ask questions on my Discord server: https://discord.gg/4FsHgtBmFK
Sign up for my monthly newsletter: https://news.zylinski.se/
You can support my blog, my YouTube channel and my open-source projects by becoming a patron or by sponsoring me on GitHub.
Have a nice day! /Karl Zylinski